Saturday, November 29, 2008

Black Friday?

Mine was pretty colorful! I don't generally hit those ultra-early sales, unless there is something significantly discournted that I plan to buy anyway. I did venture out around 9 am and hit some of my favorite craft and thrift stores. I managed to buy a few presents and stocking stuffers, but embarrassingly, most of the goodies were just for me!
One of my most extravagant purchases was a set of richly toned embossing powders. I wanted to add a few colors to my meager stash, but they didn't have a big selection and each 1 0z. jar was over $3. With my 40% off coupon, the set of 16 half-ounce vials was only $17.99. Sure, it cost a bit more, but the colors... Oh! the colors! Very deep, rich colors! More my style than the few pastels on the shelf. I put back some of my other splurges so I wouldn't overindulge too much.

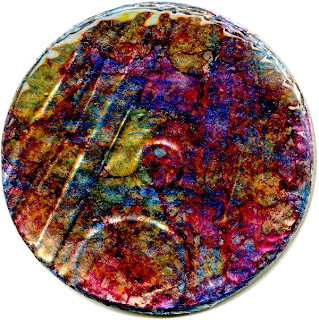
You can see some of the rich colors on yesterday's circle. I took the embossing pad and pressed just the corner, embossed and then repeated a little distance away. It had lots of texture, but when I covered it all with a thick coat of clear, they softened and blended. I still like it, but I think next time I will use the diamond glaze and retain some of that texture.

I hope your "Black Friday" had some colors just for you!

Friday, November 28, 2008

Family Circle

Today I used a different type of tool... my granddaughter!

Kady chose some heart stickers and a few colors of permanent markers to use on the gesso covered chipboard. I added a metallic swash and colored the edges purple. Kady was fascinated with the diamond glaze. Nothing beats creating with family!

Thursday, November 27, 2008

Giving Thanks

#12

I spent the morning and early afternoon with my older daughter and my two granddaughters. We engaged in a great family tradition - eating donuts while watching the Macy's Thanksgiving Day Parade. The 4 year old was thrilled with all the balloon characters. The baby just wanted to be held and fed. I know my other daughter and my mom were visiting the extended family down in California. (I"ll be seeing them for Christmas.) I am so thankful for my family and friends. Happy Thanksgiving!

#10

"M-I-C... See ya real soon..." I just wanted something easy, so started with scrapbooking paper and finally used that ultra-sticky red tape I had to adhere the micro-beads.

#11

This circle will not end up on my walls like most will. This one is a gift. The recipient may see this blog, so I want it to remain a secret until they have unwrapped it for themselves. Then, the "normal" image of the circle will be posted.

Monday, November 24, 2008

Inked Foil Tape


Aluminum tape (from the hardware store) over shaped bits of tape and then covered with alcohol inks. A bit of dry brushed metallic blue and some spots of embossing powder. All covered with diamond glaze. Colorful, huh?

Sunday, November 23, 2008

Number 8


Wow. This one is more interesting blown up from the scan than in its real 1 inch size. Some of the same embossing powder and metallic paints. Added some micro-beads in glue in the middle. Added the heart because it needed something. I'm not sure that was "it," but that's how it goes with experimenting.

Saturday, November 22, 2008

Craters?

Friday's experiment was to use something other than the tacky embossing pad or pen to adhere those embossing powder crystals. I grabbed the closest thing, some craft glue intended to secure "jewels" to fabric.

To backtrack a bit, I began with the idea of making a paisley-type design with micro-beads and glitter embedded into the embossing powder. I drew a rough paisley shape with the embossing pen directly onto the chipboard. I was to lazy to prime with gesso and the result was that the pen mostly absorbed into the cardboard, leaving little to grab the powder. I was left with a few clear puddles that also partly absorbed into and discolored the cardboard. A mess.

Figuring it was too late to prime, that's when I grabbed the glue and filled in my rough paisley shape. I sprinkled embossing powder into the glue and decided to see what would happen if I used my heat gun to melt the powder and dry the glue all at the same time. Would it just seal over or would it be like the old candles we made by pouring the wax over bits of ice? (You DO remember doing that, right? If not, just wait and that "retro" craft will make a comeback and you can try it!)

The glue and powder fizzled and bubbled! I loved it! Then, I painted with some russet and gold metallic paints and speed-dried with the heat gun. All the embossing powder under the paint bubbled and blistered. Cool! I played with adding more powder and more paint and more heat. Here is the result. All finished with diamond glaze for that glossy finish I'm going for in this group of work.

PS: Please note that all my circles look way better in person than scanned or photographed. I can't seem to get the right angle to show the colors and gloss without too much reflection.

Friday, November 21, 2008

Snow

Well, it isn't quite cold enough outside to snow, yet, but Thursday's circle hints at the weather to come.


Circle is base coated with gesso, then a rubber stamped a snowflake and embossed with ultra thick clear embossing powder. An embossing pen was used to write the word "snow" and it was also embossed. The entire piece was painted with (what else) metallic blue paint. After drying, I rubbed briskly to remove the paint from the embossed areas and reveal the images. Finished with a nice coat of diamond glaze.